Do you know some people rely on content structure to navigate the information within a document?
Visual readers use the appearance of headings to understand content relationships and to quickly find the sections they want to read. However, without properly formatted programmatic headings, screen reader users cannot easily jump between sections. Instead, they must read the entire document to locate specific content. Fortunately, document authors can ensure equal access by using built-in styles in document authoring tools to properly structure their content.

How Heading Structure Works
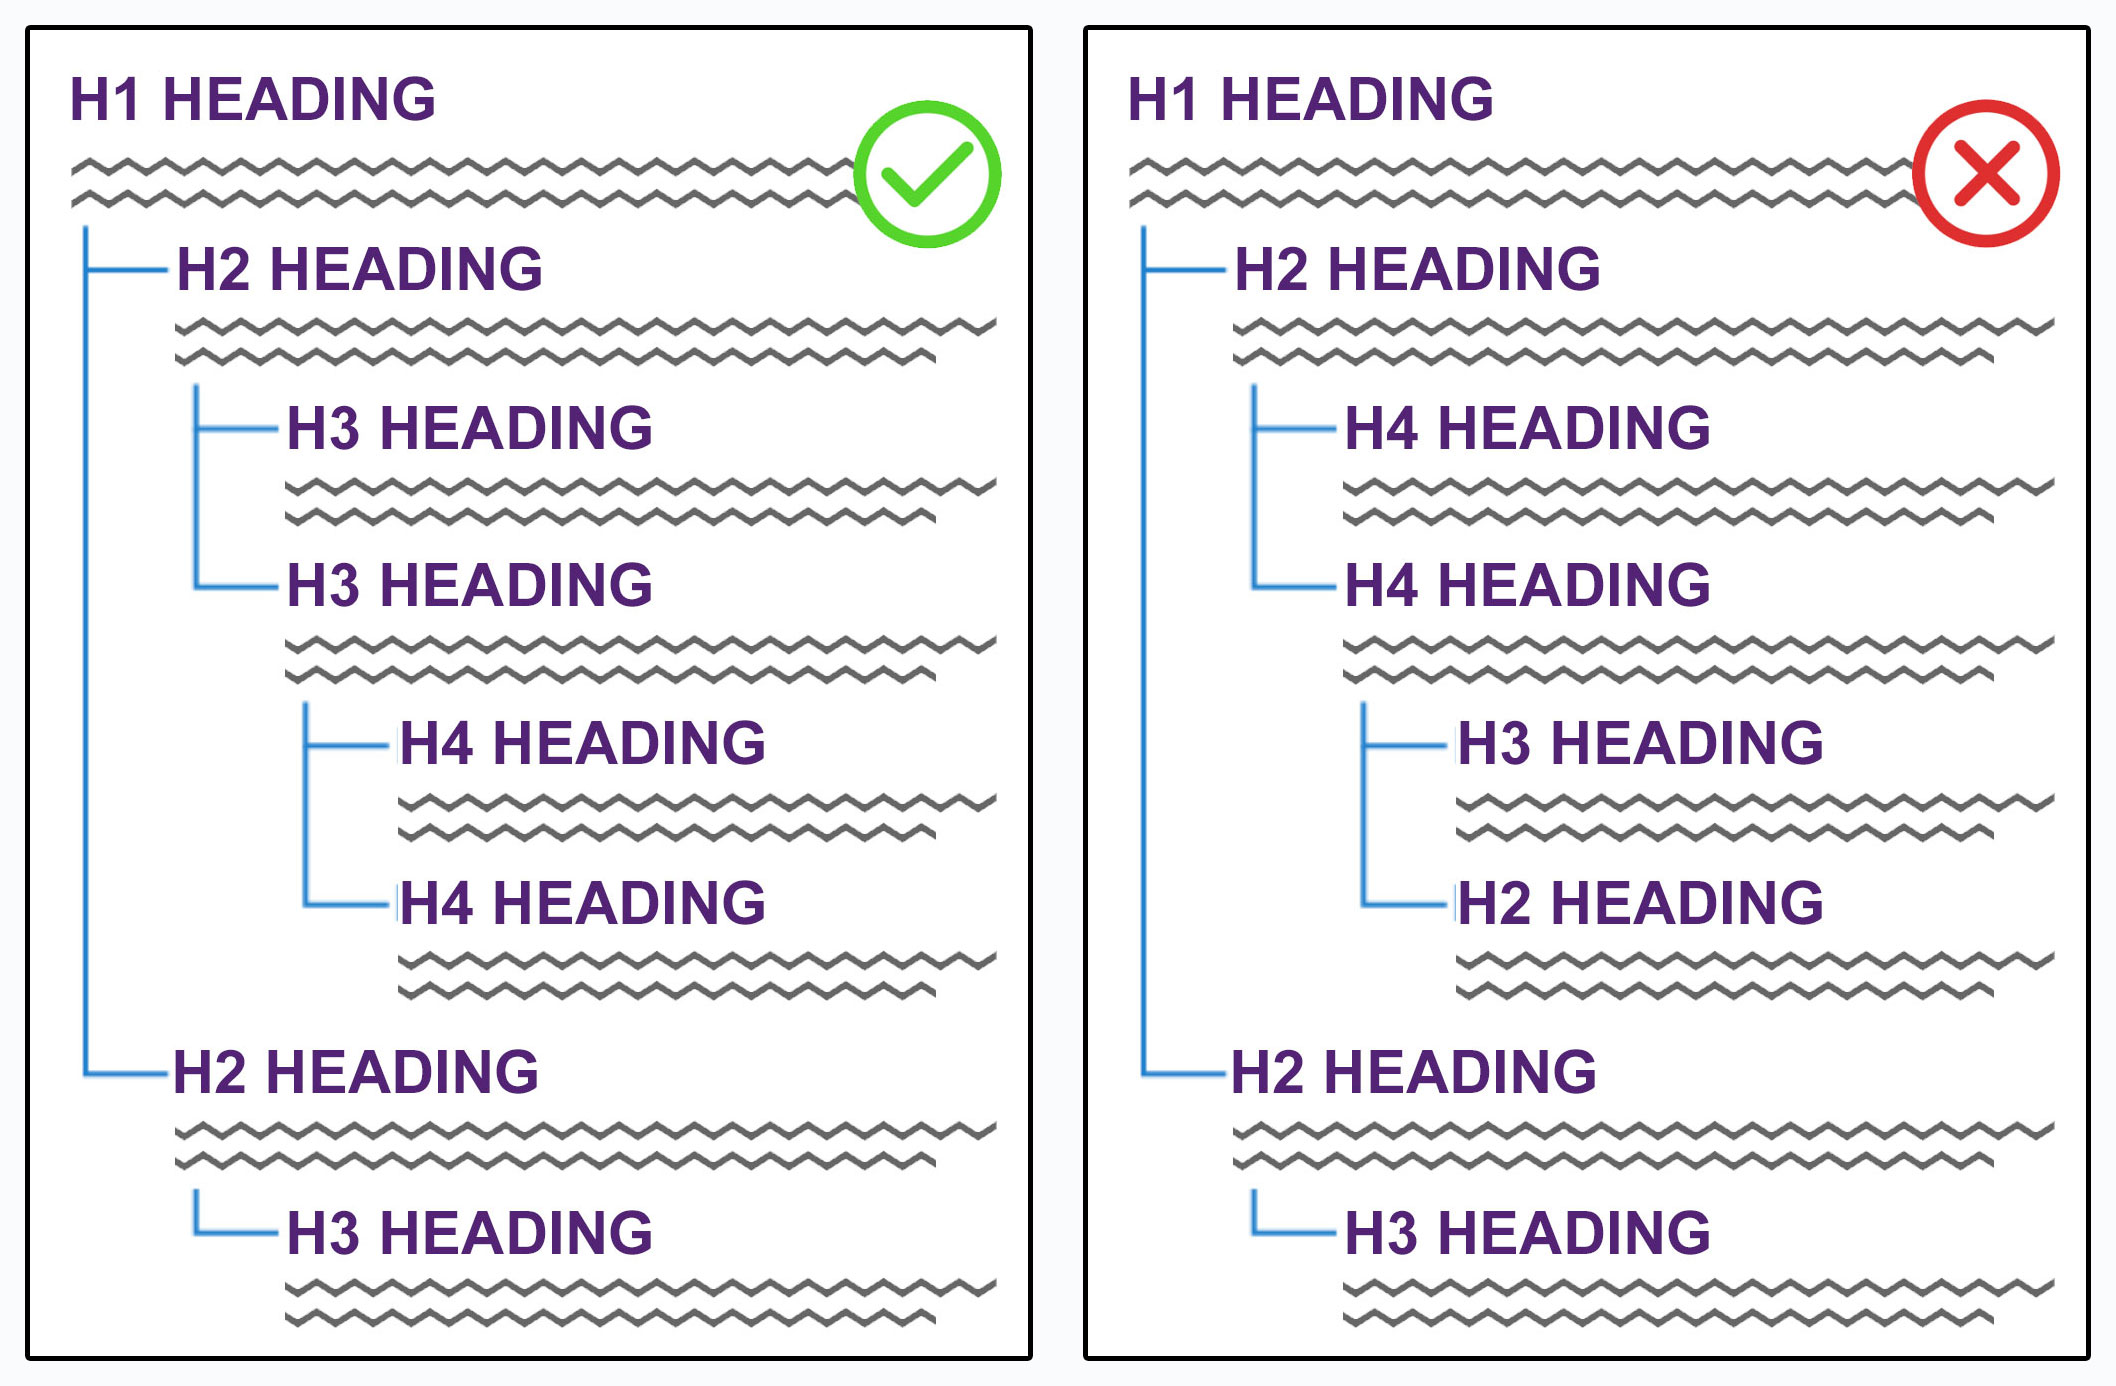
A document’s heading structure acts like an outline, organizing content into different levels of importance. The main title (Heading 1) introduces the overall topic, while subheadings (Heading 2 and below) break the content into sections and details. This hierarchy helps readers quickly scan and understand the relationships between sections. For instance, Heading 2 introduces major sections under Heading 1, and Heading 3 further breaks down those sections.
Why Heading Order Matters
Heading structures must follow a logical sequence to guide the reader smoothly. Skipping heading levels (like jumping from Heading 1 to Heading 4) disrupts this flow and makes it difficult for readers, especially those using screen readers, to comprehend the document’s organization. Heading 2 should follow Heading 1, and Heading 3 should only be used within sections introduced by Heading 2. This logical progression ensures clarity for all users.
How to Start Using Headings
No matter which office software you use, you can apply heading styles in three steps:
- Type your heading text,
- Highlight the text to be styled, then
- Select the appropriate Heading level from the style pane.

If your organization uses standard templates, ensure that the template’s styles for headings and normal text meet accessibility standards. While using an accessible template doesn’t guarantee an accessible document, it can help improve efficiency, reduce remediation needs, and minimize delays in meeting accessibility requirements.
For more guidance on document Headings, visit resources for document creators to include the Module 2: Use Styles to Create Headings.